Our User interface has been updated
It now automates links from
Amazon, Walmart Creator, Mavely,
URL Genius, Genius Links, JoyLink, and PostTap.
Click here for a demo on how to create a template using them.
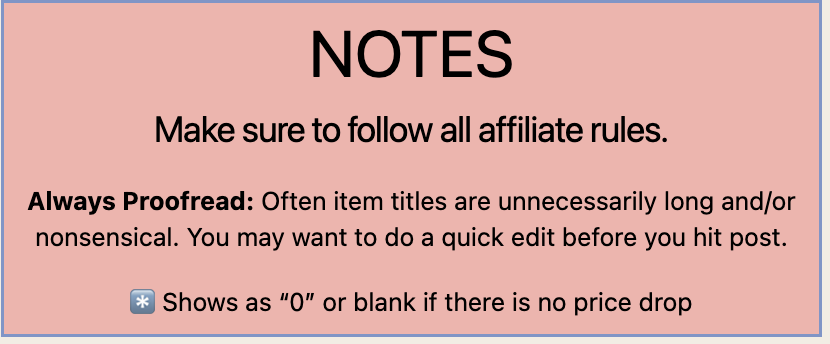
NOTES
• Video tutorials are for a previous version. Additional link services have been added and the buttons are reorganized, but mechanics of how it works hasn't changed.
You'll probably still find them helpful. Updated written Instructions are available below the videos.
![]()
Installing Chickadeasy & Creating your account
Chickadeasy will not operate without a valid license key received either from subscribing or signing up for a free trial.
Chrome Extension Installation
-
- Install the Chickadeasy Chrome extension from the Chrome Webstore link included in your welcome email,
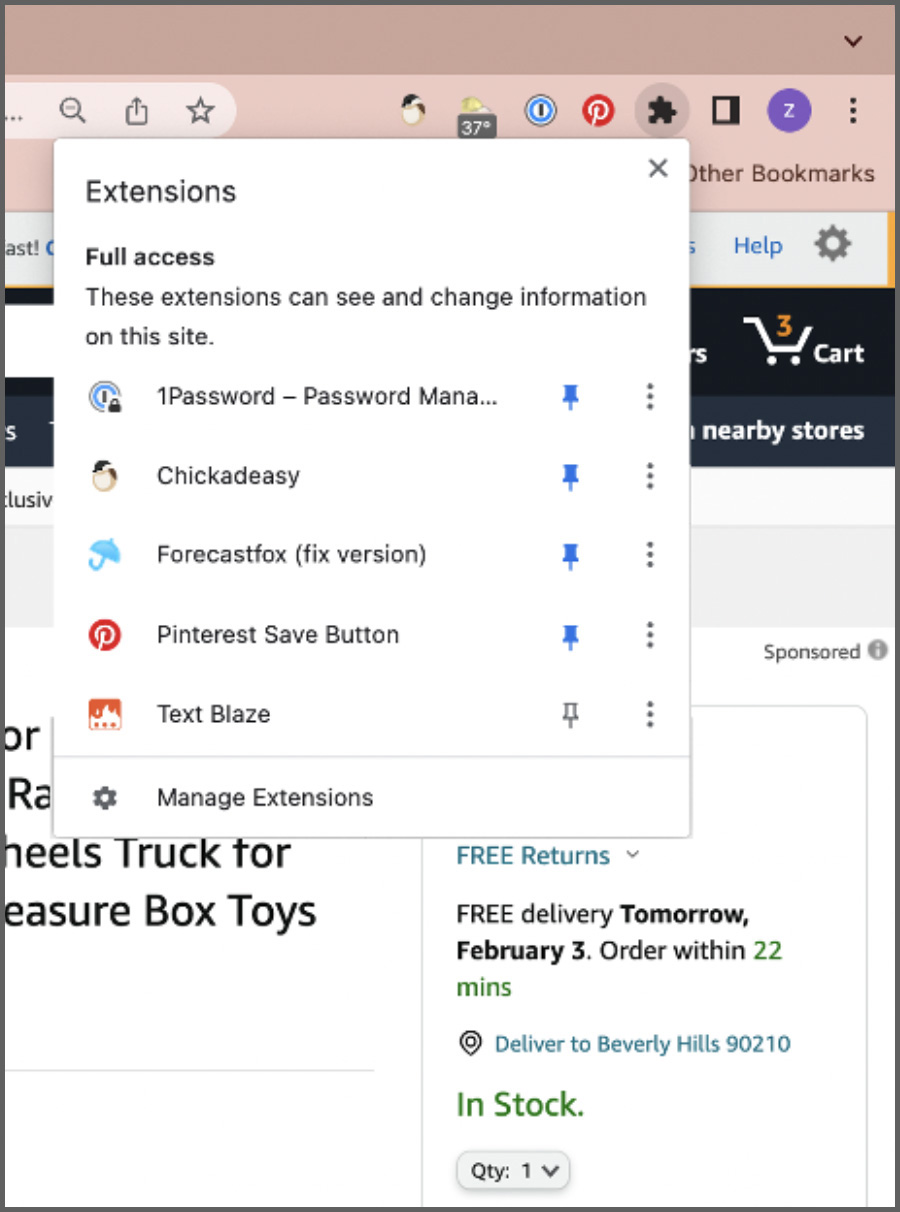
or CLICK HERE - Click on the Chickadee icon logo in the extensions toolbar.
- If you don’t see the icon logo in the extensions toolbar, click on the puzzle piece in the browser toolbar. If Chickadeasy is installed correctly, it is always accessible by clicking on the puzzle piece. If you'd like it to appear in your extensions toolbar for easy access, click the pin icon next to it in the extensions list. Blue means it’s pinned to the toolbar. A black outline means it’s accessed by clicking on the puzzle piece.
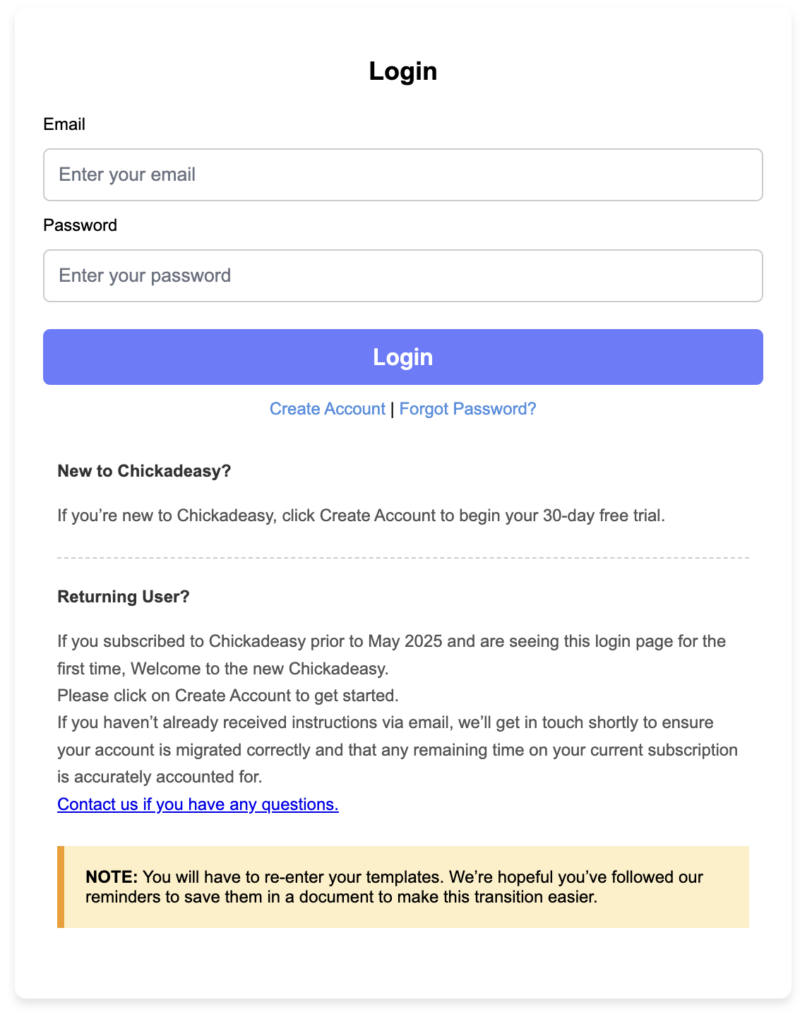
- Create or sign into your chickadeasy account. If you aren't currently signed in, you'll see this log in request when you access the Chickadeasy extension page. If this is the first time using Chickadeasy, click "Create Account" under the "Login" button.

- Make sure you're signed into the Amazon account you use as an affiliate the you have SiteStripe activated.
- After installation, go to an Amazon product page. The Chickadeasy quick access tools will attempt to display in your SiteStripe.
If you don’t have SiteStripe activated in your Amazon Affiliate account, you can learn more about that here: https://affiliate-program.amazon.com/help/stripe.html.

- Once you've signed in to Chickadeasy, you will see the Chickdeasy quick access tools in your Amazon SiteStripe and above the item title on Walmart when you're on a product page (you may have to refresh the page the first time). It will look something like this:
Amazon:

Walmart:
- In order to display, Chickadeasy needs the share tools to be turned on in the sitestripe settings (if you don't see them, check the gear icon in the top right of the sitestripe)
⏫ Back to top ⏫
- Install the Chickadeasy Chrome extension from the Chrome Webstore link included in your welcome email,

How Templates Work
For simplicity, these instructions focus on Facebook posts, but this is transferable to anywhere you want to share your affiliate links. Just make sure to follow Amazon and Walmart terms and policies! This section includes an explanation of the interface, followed by steps to set up your own template.
Remember to SAVE OFTEN while you’re creating your templates. If changes have been made since the last save, the “SAVE” button will be green. If no changes have been made it will stay gray. As a safety measure, we recommend copying and pasting your individual templates in to a document you can access later in case there is an issue that resets your extension. This will allow you to just paste them back in rather than recreate from scratch.
Template Interface
1. Default Formatting: Chickadeasy comes with a working post format already created for you just to get you started. 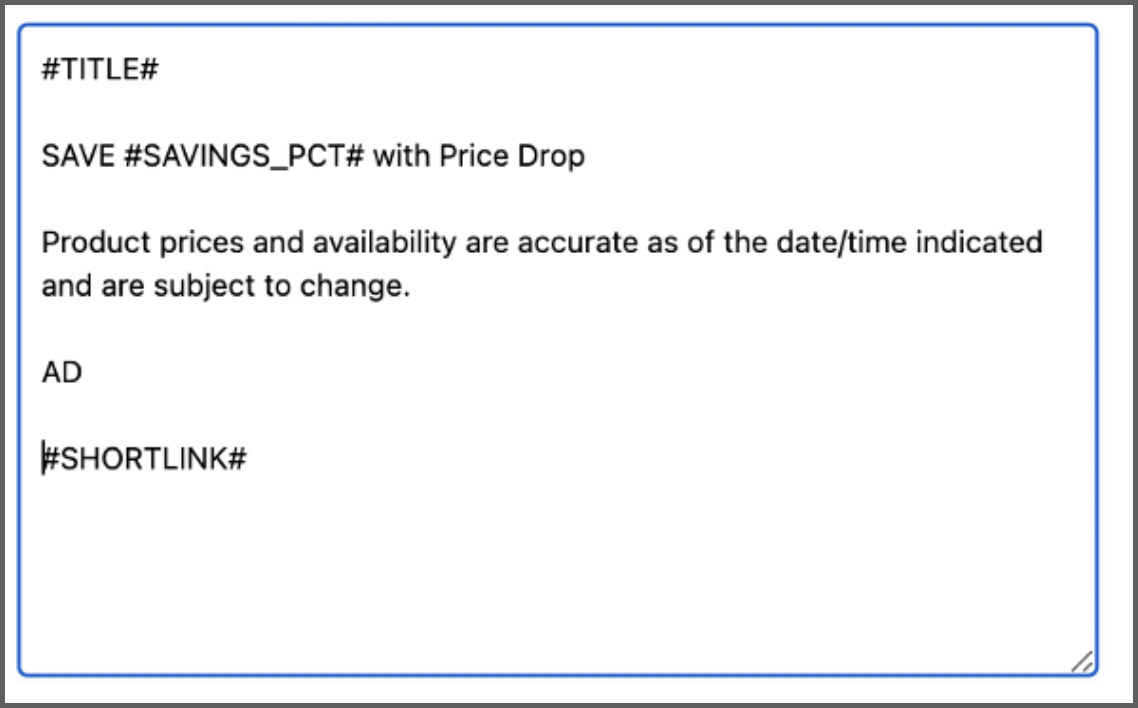
2. The default template will create a facebook post that looks like this: 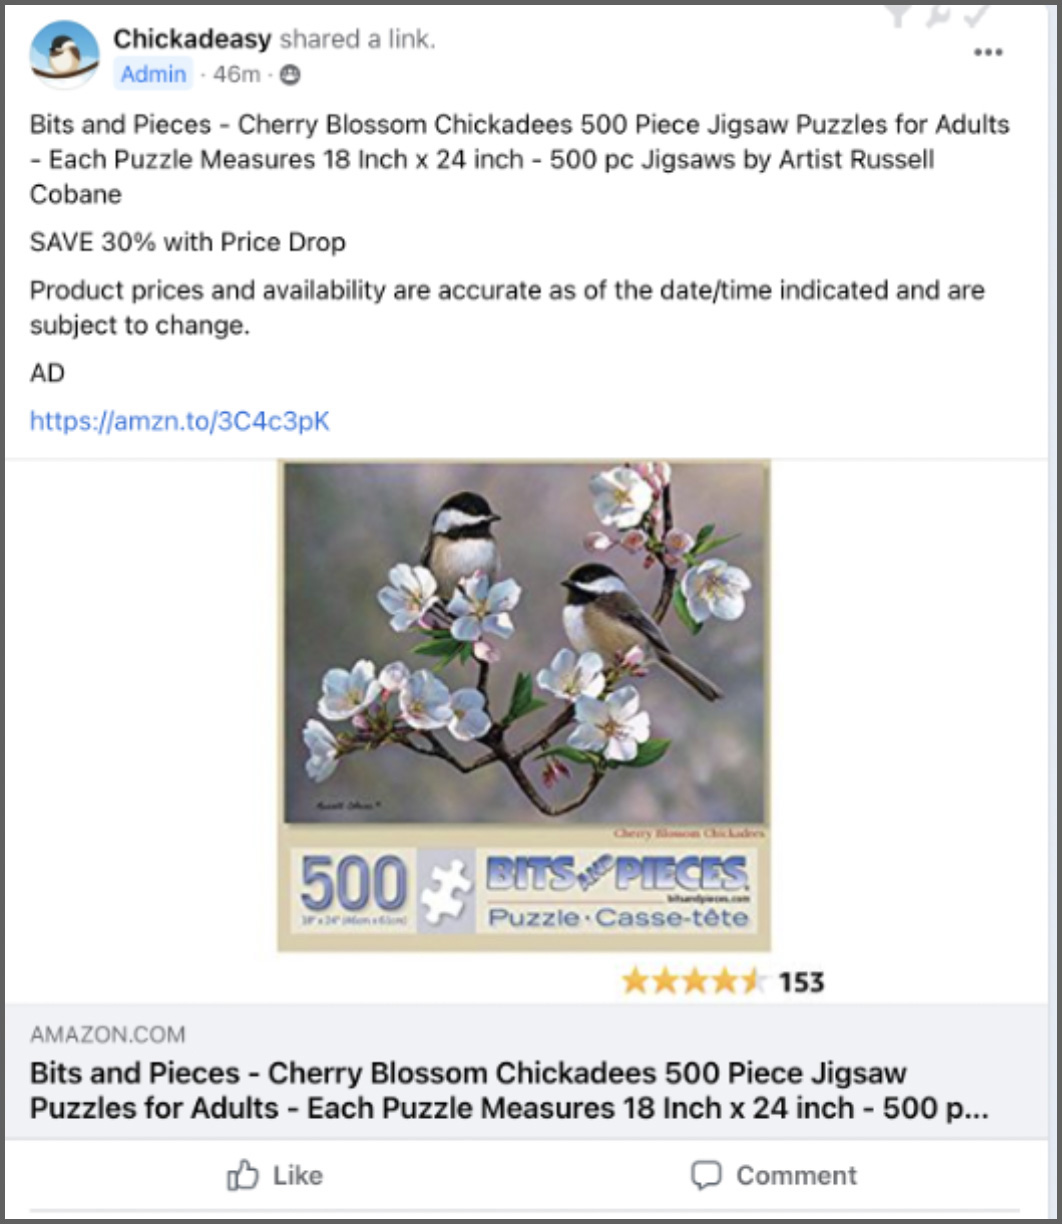
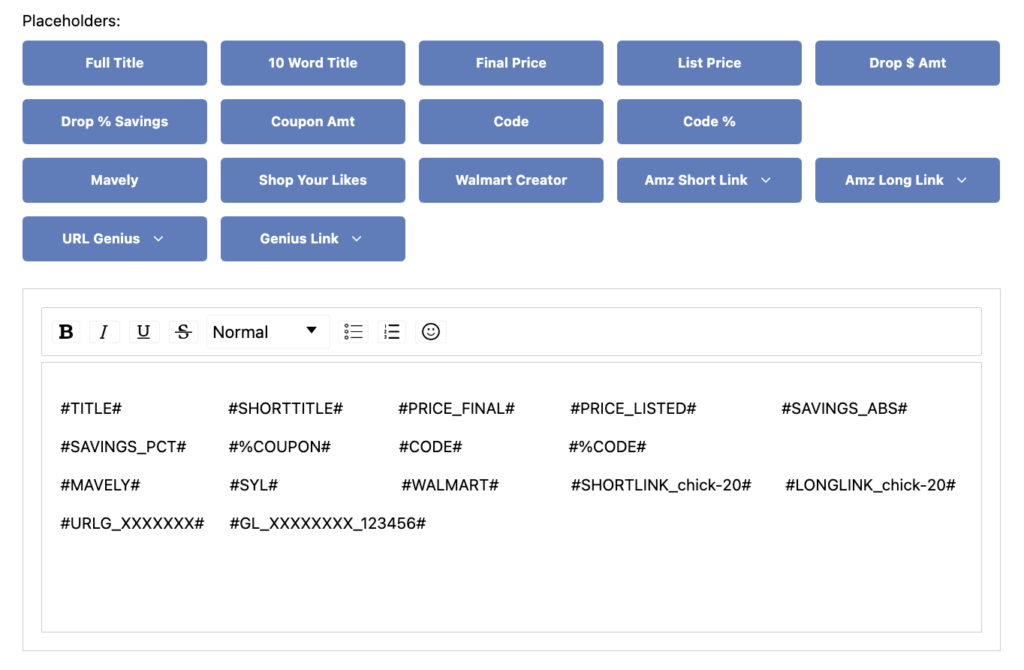
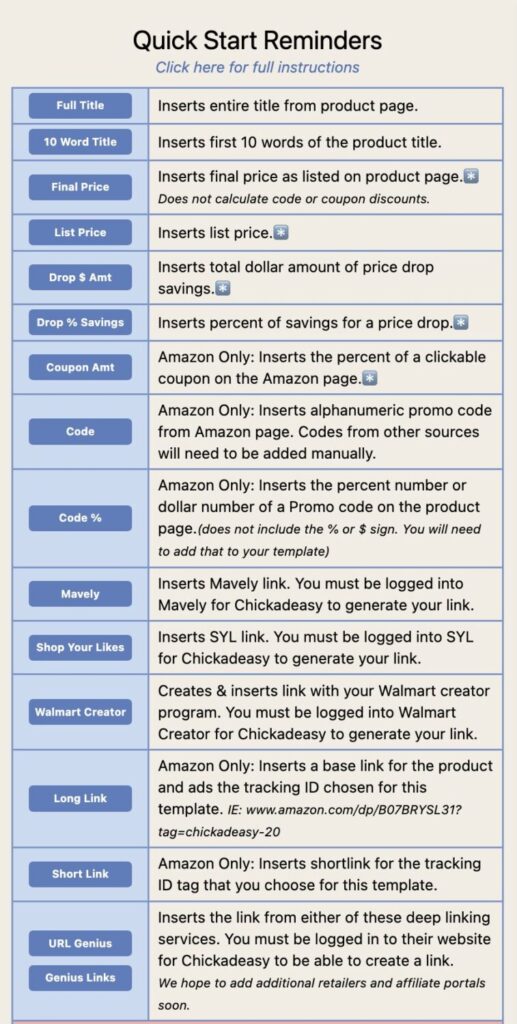
3. Placeholder Tag Buttons: Each blue button in the options window inserts a Placeholder Tag with code that tells the extension what information to fill in from the product webpage. All you have to do is click the button for the data tag you want and it will insert itself into your text. Your text can be as long or as short as you want.
(Walmart compatibility, code, and coupon buttons are available to professional subscribers only)
Genius Links & Mavely Upgrade (August 2024)
As of August 21, 2024, Chickadeasy can automatically create links from Genius link and Mavely. This came with some minor changes to the user interface.
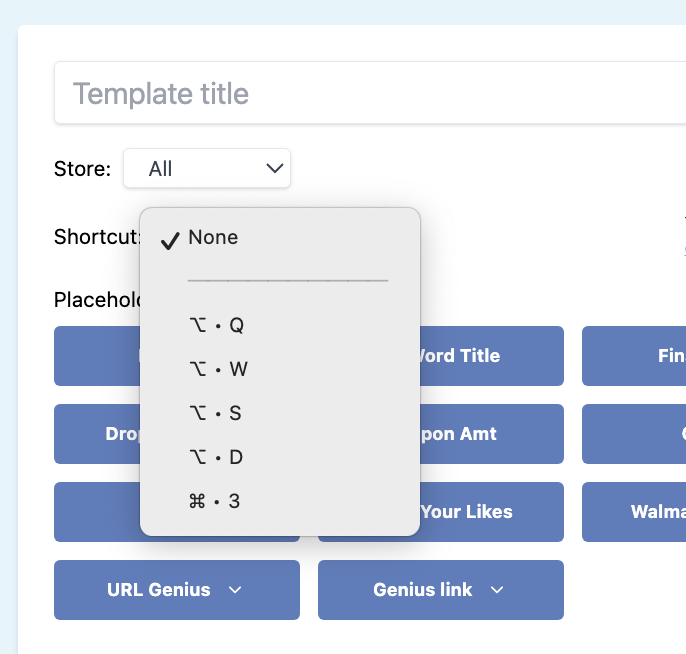
1. Amazon tracking IDs are no longer located in a separate drop down. They are accessed by clicking on the place holder button :Amz Long Link or Amz Short Link and choosing your tracking ID.
2 .Mavely and Genius Links can be added to your template in the same way, by clicking on the placeholder button and, for Genius links, choosing which group. Mavely only provides one link, so there won't be different choices for that one.
![]()
Create a Template
- Give the template a short title, then choose the store you would like this template to be accessible from.

The Store classification system filters the available templates to ensure they only appear in the dropdown menu if they are compatible with the retail site you are currently working on. When a template is classified as 'All,' it will be visible regardless of the site. However, selecting 'Amazon' will limit the template's visibility to Amazon products, while choosing 'Walmart' will restrict it to Walmart products. Please note that the Tracking ID feature is exclusively applicable to Amazon products, and compatibility with Walmart products is only accessible with the Professional Plan subscription. For more information about creating Walmart templates, please watch our 4 minute tutorial video: https://youtu.be/AB9mreP6l6g - Create the template using your own text and placeholders where you want to insert data from the product page.
- Create a post! See the next section for further instructions.


⏫ Back to top ⏫
![]()
Create a Post
There are two ways for Chickadeasy to create a post from the templates you’ve created. You will figure out which of these methods, or some combination of both, fits best for your workflow as you get used to using the extension. Note: Amazon disallows some products from being shared in their affiliate program and blocks others from sharing price info. The data for these may show as "null"
Method 1: Use the Chickadeasy Quick Access Tools
Remember to always wait until the Quick Access tools display in the SitesStripe area. This may take a few seconds, depending on your internet speed.
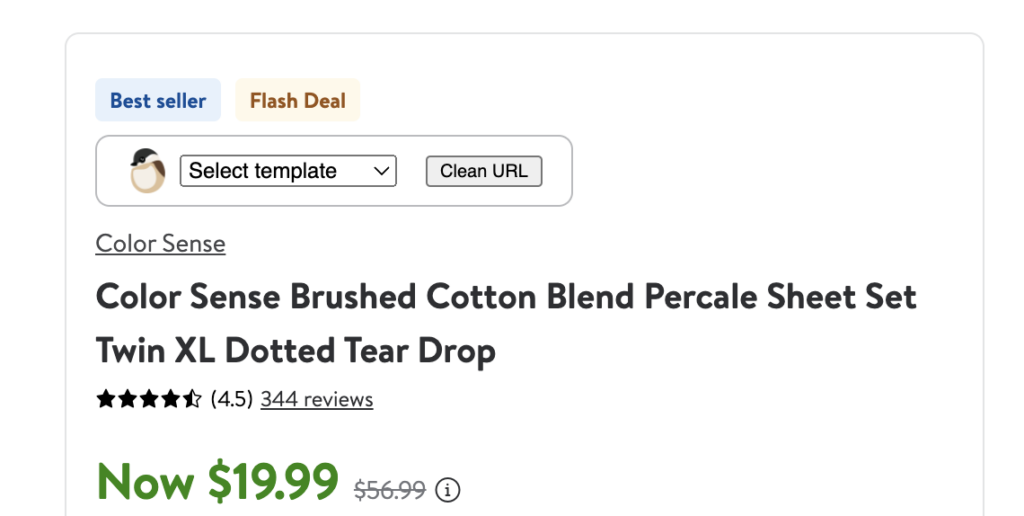
- The Chickadeasy Quick Access tools display within the SiteStripe area of your Amazon Product pages, and above the product title on Walmart pages.
- Choose the template that you want to use from the dropdown menu, then click the Chickadee.
- Your fully formatted post will be automatically ready for you to paste wherever you want

Method 2: Use a Keyboard Shortcut
- Use the Shortcut drop-down to choose one of the default keyboard shortcuts (Alt+Q, Alt+W, Alt+S, or Alt+D) or one of your custom shortcuts (described in Create Custom Keyboard Shortcuts below). Each shortcut can only be used once!

- Save the template.
- Go to any Amazon or Walmart product page and wait for the Chickadee icon to load in the SiteStripe. (Walmart compatibility is available to professional subscribers only)
- Choose your template from the drop-down menu and click the Chickadee icon in the SiteStripe, then directly paste the generated text where you want to post it, or use any of your assigned keyboard shortcuts.
- The SiteStripe easy access tool area will change to “✓Copied!” for a few seconds to indicate when the content is ready to paste.

⏫ Back to top ⏫
Create Custom Keyboard Shortcuts
You can create custom keyboard shortcuts within the Google Chrome browser if you want to use a different keyboard shortcut or need to have more than the four default shortcuts.
- Click on the blue “Chrome’s keyboard shortcuts extensions page” link.

- Click the pencil icon and type the key combination you would like to use in the text field.

- Key combinations must begin with Alt ⎇, Control/Ctrl ^, or ⌘ Command (Mac), and include a letter or number.
- Any keyboard combination you enter here will override any other assignment for that shortcut set by Google Chrome itself, so be careful not to use combinations that may be necessary for operating Chrome (do not use combinations like Ctrl+PControl+p, Ctrl+QControl+q, Ctrl+WControl+w, etc.).
- A list of all default Chrome keyboard commands is here: https://support.google.com/chrome/answer/15717


3. Once you’ve added the keyboard shortcuts you intend to use, close this window, go back to the Chickadeasy options window, and refresh the tab/window. The shortcuts will now be included in the drop-down menu.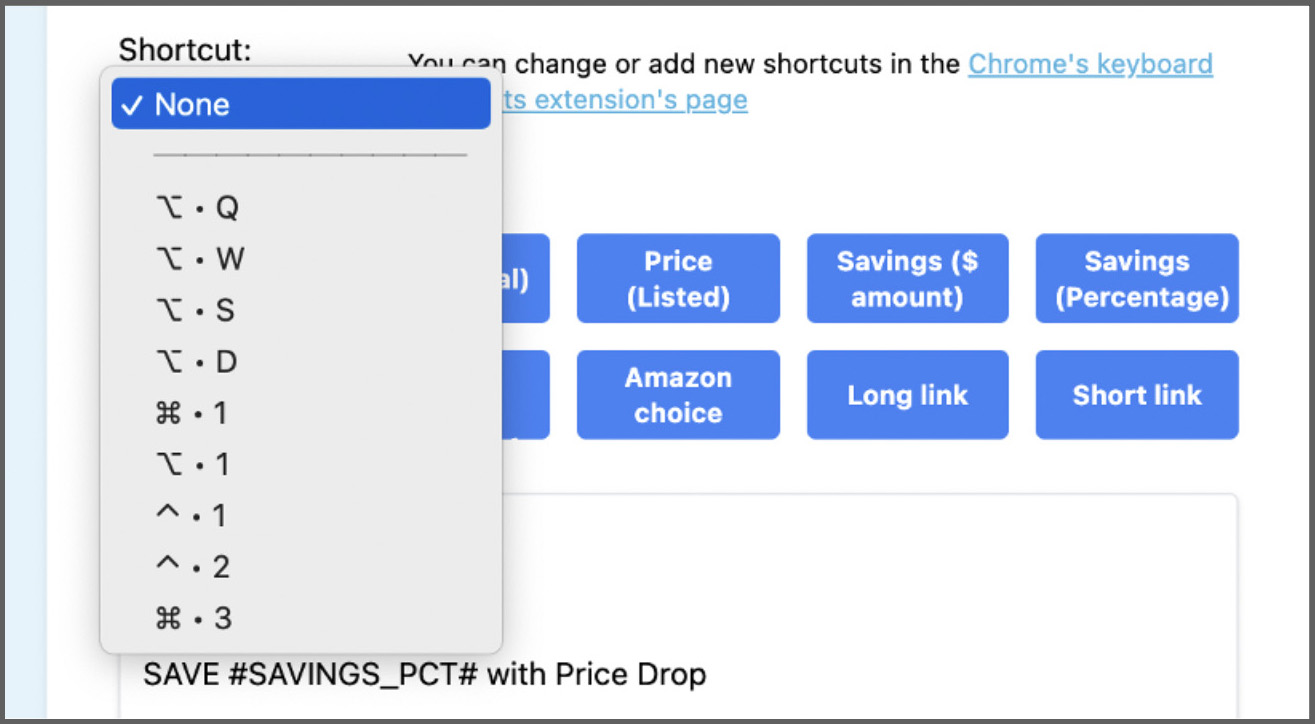
⏫ Back to top ⏫
Chickadeasy Support
If you have any questions, please use the contact form or send an email to support@chickadeasy.com. We will respond within 1-2 business days.
You can also join and post in our Facebook group: www.facebook.com/groups/chickadeasyvip. You may get faster help this way.
⏫ Back to top ⏫
![]()
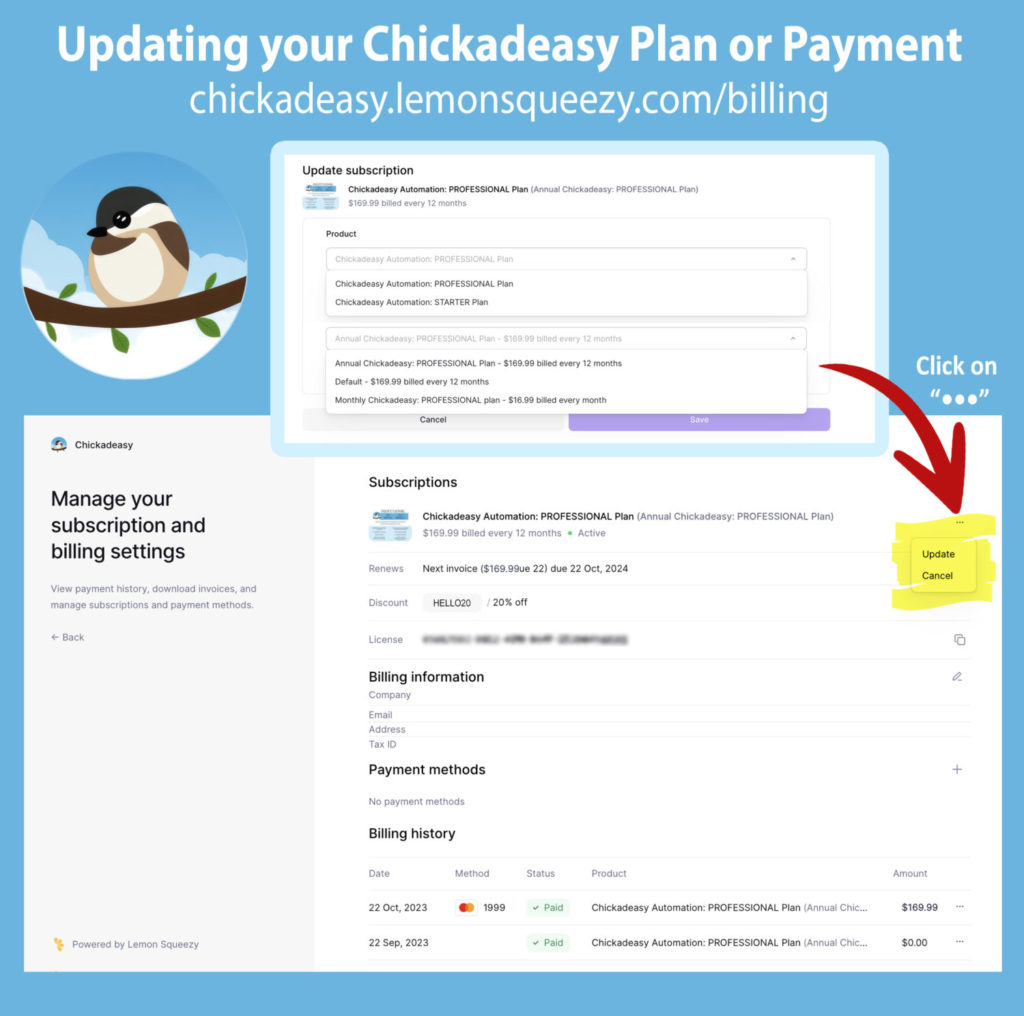
Managing Your Subscription
Visit your Customer Portal: by clicking the button below, or visiting https://chickadeasy.lemonsqueezy.com/billing where you can edit your billing information, change your subscription level, or cancel your subscription.
To manage your subscription:
- Select the order through which you originally started the subscription. and click the ••• that is on the right side on the same line as your subscription
- in the drop down menu that appears, choose "Update" or "Cancel"
- If updating, choose your subscription level and payment plan in the drop down menus provided.
-
If canceling, click the "Cancel Subscription button" that appears. If you cancel your subscription before the end of your billing cycle, you will still be able to use the service until the end of your paid subscription period. After canceling, you will not be charged again